

|
Casey Love
Sculpting
the Slayer
|
|
|
|
|
|
Step
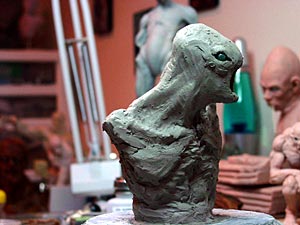
6: I'm now just using smaller worms of clay and different shapes of
clay to block in the basic structures of the piece, building the character
as I go. I'm also taking away small grooves of clay in certain areas where
I don't want it. You will also notice the start of the chest muscles.
I just continue to refine things as I go getting closer and closer to
what I'm looking for. Don't be afraid to try new things and push the clay
around until you are happy with what you see. |
|
 |
 |
 |
 |
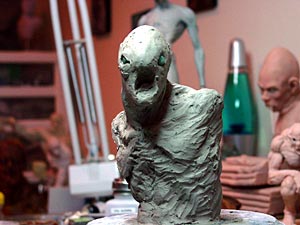
Step 7: O.K. now I'm using a small rake tool to refine the areas of the sculpture and to help start to refine the shapes I previously blocked in . Also, notice the large folds and wrinkles I've added to the side that the creature is leaning. This is a very important feature and help's to give the feeling of movement and action to the piece. It's very important not to loose site of what your creature is doing, and to make sure thing's are making sense in the pose by adding wrinkle's or stretching skin over muscle in the right areas. Obviously, the creature will have some pulling action to the skin on his left side. Whenever a muscle is contracting, the opposite muscle is being stretched or pulled and it's a give and take situation that happens between the muscles. |
|
 |
 |
|
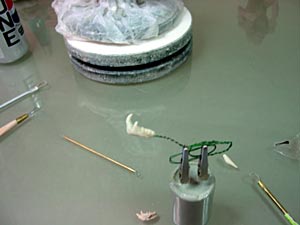
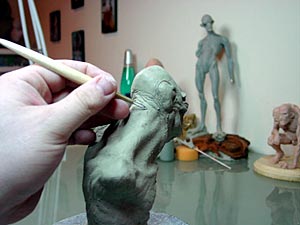
Step 8: Here I have some small wire and Im using sculpey three translucent bakeable clay to block out some salmon fish teeth to match some Real salmon teeth that I found on a local, nearby beach. I live up in the North West where Sockeye Salmon fish are very popular. So it's very easy to find bone's and such. I like to sometimes use stuff from nature in my sculptures and it can really help out a great deal to give a sense of organic natural feel to your work. So keep an open mind to what nature has to offer. You can also see some of my favorite tools laying around. In the second pic you can also see the the real salmon teeth that are being used. This also gives the creature a real angry look. Along with the heavy set brow bone area, the high cheek bone area really helps make the difference. |
|
 |
 |
|
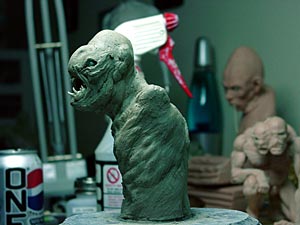
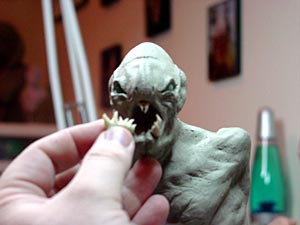
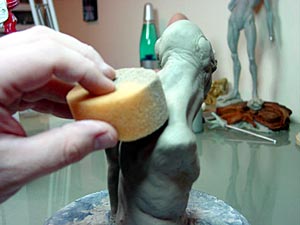
Step 9: Now you can see I'm adding the teeth in the sculpted out slot. After carefully sculpting and matching up the sculpey teeth, I the proceeded to bake out the sculpey teeth with a heat gun. Be carefull not to burn the teeth and also not to under bake the teeth. Generally follow the guide lines on the sculpey package for baking time and heat temp. At this point you will also notice that I have really refined the sculpture and cleaned it up considerably. You can achieve the clean up with the use of a small round orange sponge or a soft brush and just a little water. You don't want to drench the piece down, unless you want to make mud pies!!!!! I rarely use water. I only use it when the piece is getting very dry, or for blending. |
|
 |
 |
|
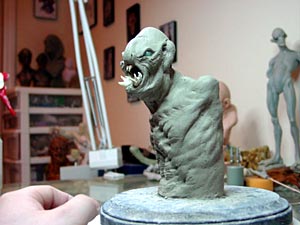
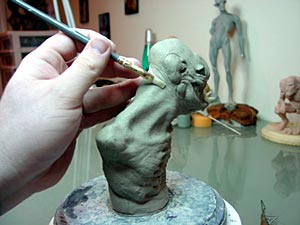
Step 10: Now you can see Im using one of my favorite Kemper tools to carve in some wrinkles and details in on the piece. Then I use a touch of water on a brush to brush down the wrinkle's and blend them in. If you want to really have soft natural looking wrinkles, I suggest using a larger wire loop tool to gently scrape over the carved wrinkle to first soften don the hard edge's from the carving. Then brush them down with water. You will notice this helps a great deal to soften them down and give them a nice natural feel. Also using a round orange damp sponge to gently push on the wrinkle works well. Also wiggling your hand and fingers as you carve in the wrinkle will help give a nice natural look. |
|
 |
|
|
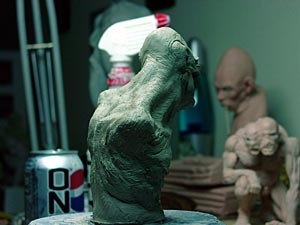
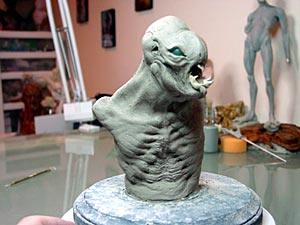
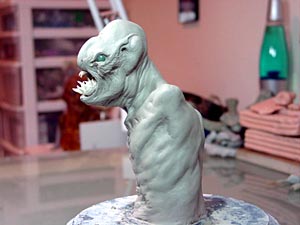
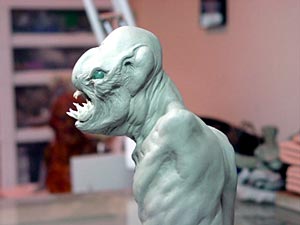
Step 11: Here you will notice that I have thing's very well smoothed out. I like to get things as refined and smooth as possible before starting to much detail. I simply used the orange sponge to smooth out the forms. It's quick and much easier and faster then a brush, however I use a brush for the tight spots and details. I'm also playing around with some different details in the head to see what works best. Simply playing around in the clay and making little marks and pushing things around is how I get the look I want. Again don't be afraid to try new things. (continued on page 3) |
|
 |
 |
|
|


|
|


