

Page 2
Christian Hanson
 picture 5 |
 picture 6 |
 picture 7 |
 picture 8 |
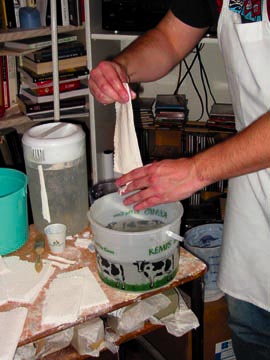
The nostril holes that were so carefully kept open will now need to be covered. Mix a small amount of alginate and slowly push it into the mold from the outside, being careful not to get it on the inside of the mold. When it sets, cover the area with a fresh strip of plaster bandage.
The alginate will start to shrink as it is exposed to the air. If you cannot start the plaster cast immediately, place a damp paper towel inside the mold to prevent this until you can start the casting.
 picture 9 |
 picture 10 |
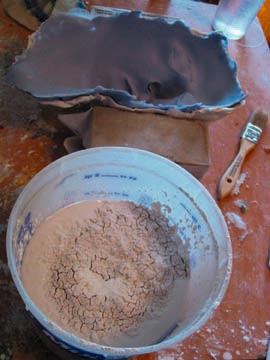
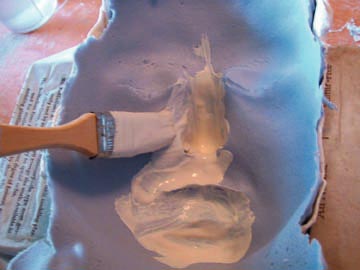
Step 6) Plaster Casting: This face-cast is going to be used as the base for a sculpture which will become a custom, slip latex prosthetic. If I was fabricating a foam rubber appliance, Ultracal 30 cement would be used for the cast, but in this case Hydrocal plaster will work. Hydrocal can be mixed fairly easily. First, fill your mixing bowl with approximately three cups of water. I just went by eye here, as I have years of experience mixing plaster. You will need just enough to give the mold about a half-inch layer of plaster. Sift in the Hydrocal until the top of the mix looks like a dry lakebed. [picture 9] Mix this up thoroughly with your hand, making sure to prevent too many air bubbles from building up. If you have sensitive hands, you may want to use latex or vinyl gloves. Once the clumps are out, use the disposable brush to paint in the plaster. [picture 10]
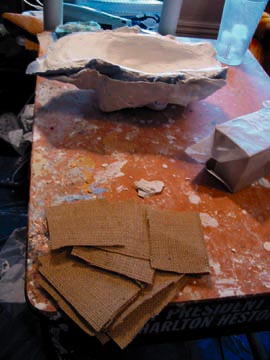
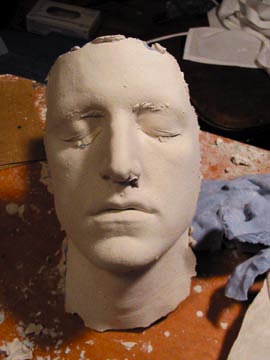
The aim here is to get the plaster into all of the details of the mold. Build up about a half-inch of plaster and allow it to set up. This should take only 20 minutes or so. It is a standard in mold making and casting to create a layer of plaster-soaked burlap in case the cast cracks. The burlap will keep it from falling to pieces. Cut the burlap into squares approximately 4" X 4". [picture 11] Mix up another batch of plaster as before and dip the individual burlap squares into it. Cover the inside of the cast with overlapping plaster soaked burlap. Use the remaining plaster to achieve a total even thickness of about 1/2-inch. As the Hydrocal sets up, smooth out the back of the cast. Once this final layer is completely set up, you can turn it over and remove the plaster bandage from the alginate mold. Finally, carefully peal the alginate from the Hydrocal cast, and there you have it. And exact casting of your subject's face. [picture 12] There are usually minor imperfections due to air bubbles in the alginate, which can easily be removed with a woodcarving tool.
 picture 11 |
 picture 12 |
| Return to Page 1 |
|
Return to The Articles |


|
|


